ساخت وب سرویس با استفاده از لاراول ۵٫۷
API به عنوان وب سرویس شناخته می شود. آیا شما دنبال این می کردین که چطور می توانید در لاراول ۵٫۷ میشه restful api ساخت؟ اگر بله من اینجا قدم به قدم آموزش آن را برای شما نوشته ام با استفاده از احراز هویت با پاسپورت.
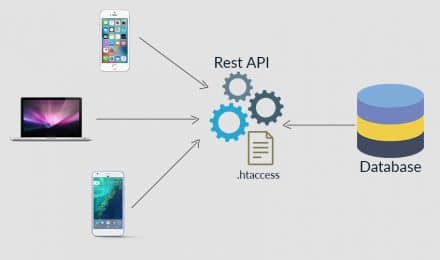
امروزه، همانطور که می دانید لاراول به خاطر ویژگی های امنیتی اش بسیار محبوب است. بنابراین بسیاری از توسعه دهندگان، لاراول را برای برای ساخت وب سرویس انتخاب می کنن. وب سرویس خیلی مهم است زمانی که شما نیاز داشته باشید وب و اپلیکیشن رو بسازید چون در این صورت شما می توانید یک بانک اطلاعاتی بسازید و با همان ساختار کار کنید.
اگر شما لاراول رو نمی شناسید یا نمی دانید که چطور ساخت وب سرویس با لاراول رو شروع کنید نگران نباشید. در این آموزش من قدم به قدم برای ساخت وب سرویس توضیح خواهم داد. بنابراین مرحله یه مرحله ما رو دنبال کنید.
- نصب لاراول ۵٫۷ :
من قصد دارم قدم به قدم مراحل را توضیح بدهم بنابراین ما ابتدا باید آخرین نسخه لاراول رو با استفاده از کد زیر دریافت کنیم. برای این منظور خط فرمان را باز کنید و در آن کد زیر را وارد کنید
composer create-project –prefer-dist laravel/laravel blog
- نصب پاسپورت:
در این مرحله ما نیاز داریم که پاسپورت را نصب کنیم بنابراین یک خط فرمان باز کنید و دستور زیر را در آن وارد کنید:
composer require laravel/passport
بعد از نصب موفقیت آمیز این پکیج، ما نیاز داریم که migration را اجرا کنیم تا جدول جدید را در دیتابیسان بسازیم. بنابراین خط زیر را وارد کنید:
php artisan migrate
- تنظیمات پاسپورت
در این مرحله، ما مجبور هستیم تنظیمات را روی سه فایل، مدل، service provider و auth config انجام دهیم. تغییرات را در این فایل ها دنبال کنید:
- در مدل ما کلاس HasApiTokens را اضافه می کنیم.
- در AuthServiceProvider این عبارت را اضافه می کنیم Passport::routes().
- در php ما api auth را اضافه می کنیم.
app/User.php
<?php

namespace App

use Illuminate\Notifications\Notifiable;

use Illuminate\Contracts\Auth\MustVerifyEmail;

use Laravel\Passport\HasApiTokens;

use Illuminate\Foundation\Auth\User as Authenticatable;


class User extends Authenticatable implements MustVerifyEmail

{

    use HasApiTokens, Notifiable;


    /**

     * The attributes that are mass assignable.

     *

     * @var array

     */

    protected $fillable = [

        'name', 'email', 'password',

    ];


    /**

     * The attributes that should be hidden for arrays.

     *

     * @var array

     */

    protected $hidden = [

        'password', 'remember_token',

    ];
}
app/Providers/AuthServiceProvider.php
<?php

namespace App\Providers;


use Laravel\Passport\Passport;

use Illuminate\Support\Facades\Gate;

use Illuminate\Foundation\Support\Providers\AuthServiceProvider as ServiceProvider;


class AuthServiceProvider extends ServiceProvider

{

    /**

     * The policy mappings for the application.

     *

     * @var array

     */

    protected $policies = [

        'App\Model' => 'App\Policies\ModelPolicy',

    ];


    /**

     * Register any authentication / authorization services.

     *

     * @return void

     */

    public function boot()

    {

        $this->registerPolicies();


        Passport::routes();

    }

}
config/auth.php
<?php


return [

    .....

    'guards' => [

        'web' => [

            'driver' => 'session',

            'provider' => 'users',

        ],

        'api' => [

            'driver' => 'passport',

            'provider' => 'users',

        ],

    ],

    .....

]
- اضافه کردن جدول محصول و مدل:
سپس، ما نیاز داریم که migration را برای جدول نوشته ها در لاراول ۵٫۷ با استفاده از دستور artisan بسازیم، پس دستور زیر را وارد کنید:
php artisan make:migration create_products_table
بعد از این دستور شما یک فایل در این مسیر پیدا خواهید کرد database/migrations و شما باید کد زیر را در فایل migration برای ساخت جدول products قرار دهید.
<?php


use Illuminate\Support\Facades\Schema;

use Illuminate\Database\Schema\Blueprint;

use Illuminate\Database\Migrations\Migration;


class CreateProductsTable extends Migration

{

    /**

     * Run the migrations.

     *

     * @return void

     */

    public function up()

    {

        Schema::create('products', function (Blueprint $table) {

            $table->increments('id');

            $table->string('name');

            $table->text('detail');

            $table->timestamps();

        });

    }


    /**

     * Reverse the migrations.

     *

     * @return void

     */

    public function down()

    {

        Schema::dropIfExists('products');

    }

}
سپس برای اجرای کد دستور زیر را خط فرمان اجرا کنید
php artisan migrate
بعد از این که جدول را ساختید شما باید مدل Product را برای آن بسازید، ابتدا فایل را در این مسیر بسازید app/Product.php و کد زیر را در آن قرار دهید:
<?php

namespace App;


use Illuminate\Database\Eloquent\Model;


class Product extends Model

{

    /**

     * The attributes that are mass assignable.

     *

     * @var array

     */

    protected $fillable = [

        'name', 'detail'

    ];

}
- در این مرحله ما روت را می سازیم لاراول فایل php را برای نوشتن وب سرویس فراهم کرده است. پس بیاید یک روت جدید در این فایل ایجاد کنیم. کد های زیر را در این مسیر قرار دهید :
routes/api.php
<?php

/*

|--------------------------------------------------------------------------

| API Routes

|--------------------------------------------------------------------------

|

| Here is where you can register API routes for your application. These

| routes are loaded by the RouteServiceProvider within a group which

| is assigned the "api" middleware group. Enjoy building your API!

|

*/

Route::post('register', 'API\RegisterController@register');

Route::middleware('auth:api')->group( function () {

       Route::resource('products', 'API\ProductController');

});
- ساخت فایل Controller
در مرحله بعدی، ما چند کنترل جدید به این نام ها می سازیم: BaseController، ProductController و RegisterController. من یک پوشه جدید ساختم به نام API و پوشه Controllers زیرا ما فقط کنترلر های api را در آن قرار می دهیم.
app/Http/Controllers/API/BaseController.php
<?php


namespace App\Http\Controllers\API;


use Illuminate\Http\Request;

use App\Http\Controllers\Controller as Controller;


class BaseController extends Controller

{

    /**

     * success response method.

     *

     * @return \Illuminate\Http\Response

     */

    public function sendResponse($result, $message)

    {

       $response = [

            'success' => true,

            'data'    => $result,

            'message' => $message,

        ];


        return response()->json($response, 200);

    }


    /**

     * return error response.

     *

     * @return \Illuminate\Http\Response

     */

    public function sendError($error, $errorMessages = [], $code = 404)

    {

       $response = [

            'success' => false,

            'message' => $error,

        ];


        if(!empty($errorMessages)){

            $response['data'] = $errorMessages;

        }


        return response()->json($response, $code);

    }

}
app/Http/Controllers/API/ProductController.php
<?php

namespace App\Http\Controllers\API;

use Illuminate\Http\Request;

use App\Http\Controllers\API\BaseController as BaseController;

use App\Product;

use Validator;

class ProductController extends BaseController

{

    /**

     * Display a listing of the resource.

     *

     * @return \Illuminate\Http\Response

     */

    public function index()

    {

        $products = Product::all();

        return $this->sendResponse($products->toArray(), 'Products retrieved successfully.');

    }

    /**

     * Store a newly created resource in storage.

     *

     * @param  \Illuminate\Http\Request  $request

     * @return \Illuminate\Http\Response

     */

    public function store(Request $request)

    {

        $input = $request->all();

        $validator = Validator::make($input, [

            'name' => 'required',

            'detail' => 'required'

        ]);

        if($validator->fails()){

            return $this->sendError('Validation Error.', $validator->errors());

        }

        $product = Product::create($input);

        return $this->sendResponse($product->toArray(), 'Product created successfully.');

    }

    /**

     * Display the specified resource.

     *

     * @param  int  $id

     * @return \Illuminate\Http\Response

     */

    public function show($id)

    {

        $product = Product::find($id);

        if (is_null($product)) {

            return $this->sendError('Product not found.');

        }

        return $this->sendResponse($product->toArray(), 'Product retrieved successfully.');

    }

    /**

     * Update the specified resource in storage.

     *

     * @param  \Illuminate\Http\Request  $request

     * @param  int  $id

     * @return \Illuminate\Http\Response

     */

    public function update(Request $request, Product $product)

    {

        $input = $request->all();

        $validator = Validator::make($input, [

            'name' => 'required',

            'detail' => 'required'

        ]);

        if($validator->fails()){

            return $this->sendError('Validation Error.', $validator->errors());

        }

        $product->name = $input['name'];

        $product->detail = $input['detail'];

        $product->save();

        return $this->sendResponse($product->toArray(), 'Product updated successfully.');

    }

    /**

     * Remove the specified resource from storage.

     *

     * @param  int  $id

     * @return \Illuminate\Http\Response

     */

    public function destroy(Product $product)

    {

        $product->delete();

        return $this->sendResponse($product->toArray(), 'Product deleted successfully.');

    }

}
app/Http/Controllers/API/RegisterController.php
<?php

namespace App\Http\Controllers\API;

use Illuminate\Http\Request;

use App\Http\Controllers\API\BaseController as BaseController;

use App\User;

use Illuminate\Support\Facades\Auth;

use Validator;

class RegisterController extends BaseController

{

    /**

     * Register api

     *

     * @return \Illuminate\Http\Response

     */

    public function register(Request $request)

    {

        $validator = Validator::make($request->all(), [

            'name' => 'required',

            'email' => 'required|email',

            'password' => 'required',

            'c_password' => 'required|same:password',

        ]);

        if($validator->fails()){

            return $this->sendError('Validation Error.', $validator->errors());

        }

        $input = $request->all();

        $input['password'] = bcrypt($input['password']);

        $user = User::create($input);

        $success['token'] =  $user->createToken('MyApp')->accessToken;

        $success['name'] =  $user->name;

        return $this->sendResponse($success, 'User register successfully.');

    }

}
حالا ما آماده هستیم که restful api و passport api را در لاراول را اجرا کنیم . برای این منظور دستور زیر را در خط فرمان اجرا کنید
php artisan serve
حال برای مشاهده عملیات انجام شده header را به این صورت تنظیم نمایید:
'headers' => [

    'Accept' => 'application/json',

    'Authorization' => 'Bearer '.$accessToken,

]
سپس برای مشاهده خروجی هر یک از لینک های زیر را در postman وارد کنید
۱) Login: Verb:GET, URL:http://localhost:8000/oauth/token
۲) Register: Verb:GET, URL:http://localhost:8000/api/register
۳) List: Verb:GET, URL:http://localhost:8000/api/products
۴) Create: Verb:POST, URL:http://localhost:8000/api/products
۵) Show: Verb:GET, URL:http://localhost:8000/api/products/{id}
۶) Update: Verb:PUT, URL:http://localhost:8000/api/products/{id}
۷) Delete: Verb:DELETE, URL:http://localhost:8000/api/products/{id}